Wednesday, August 27, 2014

Jailing Ftp user in VSFTP - locking user in their home directory

In this post we going to see about how we are going to jail a ftp user in VSFTP.  Jailing means that user is locked to their home directory, can't able view or access any other folder in that server.

Jailing is mainly done for security purpose. If the user is not jailed, so they can able to access all other folder and files, can download the main configuration files in that server which is not secured one.


First install VSFTP package in server.

[root@linuxstorages~ #] yum install vsftpd

[root@linuxstorages~ #] chkconfig vsftpd on


Create a user with directory which you need to jail.


[root@linuxstorages~ #] useradd -d /var/www/html username

[root@linuxstorages~ #] passwd username

Now change the configuration for VSFTP

  [root@linuxstorages~ #] vi /etc/vsftpd/vsftpd.conf

     Go to line 96 and enable the below line

     chroot_local_user=YES

     :wq (save)


[root@linuxstorages~ #] /etc/init.d/vsftpd restart

Now check by login via filezilla or terminal using 21 port.

Monday, August 25, 2014

Connecting SSH without Password in Linux


Secure Shell (SSH) is a cryptographic network protocol for secure data communication, remote command-line login, remote command execution, and other secure network services between two networked computers. It connects, via a secure channel over an insecure network, a server and a client running SSH server and SSH client programs, respectively


But we connect a system via SSH it will ask for password each time when we try to connect it. When we are running a script which need to connect a server via SSH port it will ask for password but we can enter it so to avoid this we are creating as pass-wordless login between the servers which helps to runs the script without any issue.


Create Authentication SSH-Kegen Keys on current machine

While we creating Authentication SSH_Keygen it will ask for path to store the file and pass phrase password the login. Don't enter any password in pass phrase just hit enter.

[root@linuxstorages ~]$ ssh-keygen
Generating public/private rsa key pair.
Enter file in which to save the key (/root/.ssh/id_rsa): [Hit Enter]
Enter passphrase (empty for no passphrase): [Hit Enter]
Enter same passphrase again: [Hit Enter]
Your identification has been saved in /root/.ssh/id_rsa.
Your public key has been saved in /root/.ssh/id_rsa.pub.
The key fingerprint is:
36:47:58:f2:03:ab:be:71:bd:99:c5:3f:87:56:13:27 root@localhost.localdomain
The key's randomart image is:
+--[ RSA 2048]----+
|        o .      |
|         B       |
|        o +      |
|       . . .  E..|
|      . S .    .o|
|     . . + .   ..|
|      o . . o  o.|
|       +   = .+ .|
|      .   +  ..o |
+-----------------+

By default it will go for RSA 2048 bit encryption if you feel need more strong encryption then can go for RSA 4096 bit encryption.

[root@linuxstorages ~]$ ssh-keygen -t rsa -b 4096
Generating public/private rsa key pair.
Enter file in which to save the key (/root/.ssh/id_rsa): [Hit Enter]
Enter passphrase (empty for no passphrase): [Hit Enter]
Enter same passphrase again: [Hit Enter]
Your identification has been saved in /root/.ssh/id_rsa.
Your public key has been saved in /root/.ssh/id_rsa.pub.
The key fingerprint is:
6c:c6:ac:12:5d:db:bb:88:12:ab:bf:a7:8e:e4:76:eb root@localhost.localdomain
The key's randomart image is:
+--[ RSA 4096]----+
|                 |
|                 |
|        .        |
|     . = o       |
|    . . S .      |
|    .. +   .     |
|  . .o.   .      |
| o..+... . .     |
| .+*E*. . .      |
+-----------------+

Move the public key to remote machine to make connection between machine.

[root@linuxstorages ~]$ ssh-copy-id -i ~/.ssh/id_rsa.pub root@192.168.1.200
The authenticity of host '192.168.1.200 (192.168.1.200' can't be established.
RSA key fingerprint is 59:0a:a0:7f:e2:cc:00:b8:19:fa:4e:4b:0c:72:5a:c0.
Are you sure you want to continue connecting (yes/no)? yes
Warning: Permanently added '192.168.1.200' (RSA) to the list of known hosts.
root@192.168.1.200's password:
Now try logging into the machine, with "ssh 'root@192.168.1.200'", and check in:

  .ssh/authorized_keys

to make sure we haven't added extra keys that you weren't expecting.

You have new mail in /var/spool/mail/root

Login to remote host machine without password now and further.

[root@linuxstorages ~]$ ssh root@192.168.1.200
Last login: Sat Aug 23 15:09:48 2014 from 192.168.1.100

Check the machine ip address after login

[root@linuxstorages_1 ~]$ ifconfig
eth1      Link encap:Ethernet  HWaddr 38:60:77:9B:FA:16
          inet addr:192.168.1.200  Bcast:192.168.1.255  Mask:255.255.255.0
          inet6 addr: fe80::3a60:77ff:fe9b:fa16/64 Scope:Link
          UP BROADCAST RUNNING MULTICAST  MTU:1500  Metric:1
          RX packets:4331151 errors:5 dropped:0 overruns:0 frame:3
          TX packets:2907478 errors:0 dropped:0 overruns:0 carrier:0
          collisions:0 txqueuelen:1000
          RX bytes:433288023 (413.2 MiB)  TX bytes:661916311 (631.2 MiB)
          Interrupt:20 Memory:fe400000-fe420000

lo        Link encap:Local Loopback
          inet addr:127.0.0.1  Mask:255.0.0.0
          inet6 addr: ::1/128 Scope:Host
          UP LOOPBACK RUNNING  MTU:16436  Metric:1
          RX packets:538498 errors:0 dropped:0 overruns:0 frame:0
          TX packets:538498 errors:0 dropped:0 overruns:0 carrier:0
          collisions:0 txqueuelen:0
          RX bytes:67721587 (64.5 MiB)  TX bytes:67721587 (64.5 MiB)

Saturday, August 23, 2014

Monitoring Windows Host Status from Nagios server

To monitor the windows machine from the nagios server we need first install the NSclient++ on windows machine host.

To download the NSclient++ in your windows machine use the below link

Link : http://nsclient.org/nscp/downloads

After downloading finished try to install the package in windows host


We need change the configuration in NSclient++

Edit following file

C:\Program Files\NSClient++\NSC.ini


Enable following service which need to monitor

;  You will need to enable some of these for NSClient++ to work.
; ! ! ! ! ! ! ! ! ! ! ! ! ! ! ! ! ! ! ! ! ! ! ! ! ! ! ! ! ! ! ! ! !
; *                                                               *
; * N O T I C E ! ! ! - Y O U   H A V E   T O   E D I T   T H I S *
; *                                                               *
; ! ! ! ! ! ! ! ! ! ! ! ! ! ! ! ! ! ! ! ! ! ! ! ! ! ! ! ! ! ! ! ! !
FileLogger.dll
CheckSystem.dll
CheckDisk.dll
NSClientListener.dll
NRPEListener.dll
SysTray.dll
CheckEventLog.dll
;CheckHelpers.dll
;CheckWMI.dll
;
; RemoteConfiguration IS AN EXTREM EARLY IDEA SO DONT USE FOR PRODUCTION ENVIROMNEMTS!
;RemoteConfiguration.dll
; NSCA Agent is a new beta module use with care!
;NSCAAgent.dll
; LUA script module used to write your own "check deamon" (sort of) early beta.
;LUAScript.dll
; Script to check external scripts and/or internal aliases, early beta.
;CheckExternalScripts.dll
; Check other hosts through NRPE extreme beta and probably a bit dangerous! :)
;NRPEClient.dll

Enter the Nagios server IP address in allow host line and enable it.

[NSClient]
;# ALLOWED HOST ADDRESSES
;  This is a comma-delimited list of IP address of hosts that are allowed to talk to

NSClient deamon.
;  If you leave this blank the global version will be used instead.
allowed_hosts= 192.168.1.202
;

Enable port for NSclient++ in windows machine.

;# NSCLIENT PORT NUMBER
;  This is the port the NSClientListener.dll will listen to.
port=12489
;

After changing configuration, start the NSclient service.

path : start --> administrative tools ---> services ---> NSclientpp(nagios)


If your firewall in enable in windows machine then add the nsclient port 12489 in firewall which allow you to access the nagios server.


Switch back to Nagios  Server

Add the check_nt command in the commands.cfg configuration file.

[root@linuxstorages~ ]# vi /etc/nagios/objects/commands.cfg

Add in last line of file

# 'check_nt' command definition
define command{
        command_name    check_nt
        command_line    $USER1$/check_nt -H $HOSTADDRESS$ -p 12489 -v $ARG1$ $ARG2$
        }
:wq (save)


Edit the nagios configuration file nagios.cfg to enable the window configuration.

[root@linuxstorages~ ]# vi /etc/nagios/nagios.cfg

Line no 39 enable windows.cfg file

# Definitions for monitoring a Windows machine
cfg_file=/etc/nagios/objects/windows.cfg

:wq (save)

Add the window remote host configuration in windows.cfg file and you can add multiple windows host machine in this file, no need create separate file for each windows host machine.

[root@linuxstorages~ ]#vi /etc/nagios/objects/windows.cfg


define host{
        use             windows-server  ; Inherit default values from a template
        host_name       winserver-2     ; The name we're giving to this host
        alias           My Windows Server       ; A longer name associated with the host
        address         192.168.1.200     ; IP address of the hos

        }

define service{
        use                     generic-service
        host_name               winserver-2
        service_description     NSClient++ Version
        check_command           check_nt!CLIENTVERSION
        }

# Create a service for monitoring the uptime of the server
# Change the host_name to match the name of the host you defined above

define service{
        use                     generic-service
        host_name               winserver-2
        service_description     Uptime
        check_command           check_nt!UPTIME
        }

# Create a service for monitoring CPU load
# Change the host_name to match the name of the host you defined above

define service{
        use                     generic-service
        host_name               winserver-2
        service_description     CPU Load
        check_command           check_nt!CPULOAD!-l 5,80,90
        }

# Create a service for monitoring memory usage
# Change the host_name to match the name of the host you defined above

define service{
        use                     generic-service
        host_name               winserver-2
        service_description     Memory Usage
        check_command           check_nt!MEMUSE!-w 80 -c 90
        }

# Create a service for monitoring C:\ disk usage
# Change the host_name to match the name of the host you defined above

define service{
        use                     generic-service
        host_name               winserver-2
        service_description     C:\ Drive Space
        check_command           check_nt!USEDDISKSPACE!-l c -w 80 -c 90
        }

# Create a service for monitoring the W3SVC service
# Change the host_name to match the name of the host you defined above

define service{
        use                     generic-service
        host_name               winserver-2
        service_description     W3SVC
        check_command           check_nt!SERVICESTATE!-d SHOWALL -l W3SVC
        }

# Create a service for monitoring the Explorer.exe process
# Change the host_name to match the name of the host you defined above

define service{
        use                     generic-service
        host_name               winserver-2
        service_description     Explorer
        check_command           check_nt!PROCSTATE!-d SHOWALL -l Explorer.exe
        }


After adding the windows host information restart the Nagios server.

[root@linuxstorages~ ]# /etc/init.d/nagios restart
Running configuration check...done.
Stopping nagios: done.
Starting nagios: done.

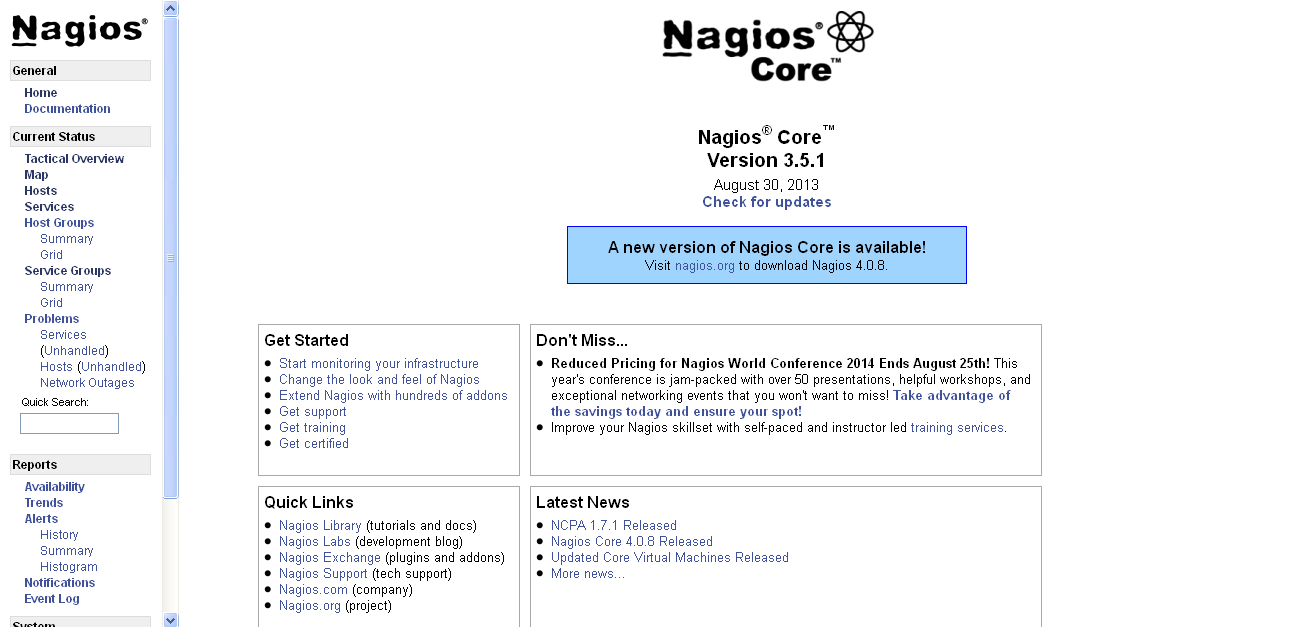
Check the Window host machine status in admin URL


Thursday, August 21, 2014

How to Setup Nagios & NREP in RHEL/CentOS - 6 Steps

Nagios is a powerful Open Source Monitoring tool that provides you with instant awareness of your organization's mission-critical IT infrastructure. Nagios allows you to detect and repair problems and mitigate future issues before they affect end-users and customers.

 We can monitor remote host and their services (HTTP, MYSQL, Disk Space etc) remotely. Its show’s warnings and alerts if something went wrong in remote servers, which will help us to detect the problem in server and find a solution for the issue which helps us to reduce the downtime of server.


Nagios will be installed in a server where we will monitor all our client machines and in client side we will install Nagios NRPE (Nagios Remote Plugin Executor) which will communicate with the Nagios server and send client machine status.

Step 1: Install Required Packages and Dependencies in Nagios Server

We need to install Apache, Php and supporting libraries file such as gcc, glibc, glibc-common, and GD libraries.


[root@linuxstorages ~]#yum install gd gd-devel gcc glibc glibc-common -y

To install nagios through yum we need to add EPEL repository in yum.

[root@linuxstorages ~]# wget http://dl.fedoraproject.org/pub/epel/6/i386/epel-release-6-8.noarch.rpm

[root@linuxstorages ~]#rpm -ivh epel-release-6-8.noarch.rpm

Now install nagios via yum 

[root@linuxstorages ~]#yum install nagios* -y

Step 2 : Configure Nagios Server

Add the admin mail address in the nagios contact file to receive alerts from nagios server.

[root@linuxstorages ~] vi /etc/nagios/objects/contacts.cfg
#
# CONTACTS
#
###############################################################################
###############################################################################
# Just one contact defined by default - the Nagios admin (that's you)
# This contact definition inherits a lot of default values from the 'generic-contact'
# template which is defined elsewhere.

#define contact{
#        contact_name                    nagiosadmin             ; Short name of user
#        use                                    generic-contact         ; Inherit default values #from generic-contact template (defined above)
#        alias                                  Nagios Admin            ; Full name of user
#        email                                 nagios@localhost        ; <<***** CHANGE THIS TO #YOUR EMAIL ADDRESS ******
#        }
define contact{
        contact_name                    pravin_contact             ; Short name of user
        use                                    generic-contact         ; Inherit default values from generic-contact template (defined above)
        alias                                  Nagios Admin            ; Full name of user
        email                                 pravin@linuxstorages.com   ; <<***** CHANGE THIS TO YOUR EMAIL ADDRESS ******
        }
:wq(save file)

To allow Nagios server admin link from particular ip address (192.168.1.54).


  [root@linuxstorages ~]# vi /etc/httpd/conf.d/nagios.conf

## Comment Lines 15 & 16 ##

#   Order allow,deny

#   Allow from all

 ## Uncomment and Change lines 17,18 & 19 as shown below ##

Order deny,allow

Deny from all

Allow from 127.0.0.1 192.168.1.54

:wq (save)

Now we can access Nagios admin link only from localhost and 192.168.1.54. 

Step 3 : Create User and password for Nagios Admin.


  [root@linuxstorages ~]#  htpasswd /etc/nagios/passwd nagiosadmin

New password:

Re-type new password:

Updating password for user nagiosadmin

Step 4 : Start Apache and Nagios service and make chkconfig(Service Start automatically on every boot). 

  [root@linuxstorages ~]# /etc/init.d/nagios start
 Starting nagios: done.

  [root@linuxstorages ~]#/etc/init.d/httpd start

 Starting httpd:                                            [  OK  ]

   [root@linuxstorages ~]#chkconfig nagios on
        

  [root@linuxstorages ~]#chkconfig httpd on 

Now access the Nagios admin link and enter user & password which created before.

Link : http://localhost/nagios 


Step 5 : Installing NRPE on Nagios Remote Host server’s 

NRPE  Nagios Remote Plugin Executor which allows you to remotely execute Nagios plugins on other Linux/Unix machines. This allows you to monitor remote machine metrics (disk usage, CPU load, etc.). NRPE can also communicate with some of the Windows agent addons, so you can execute scripts and check metrics on remote Windows machines as well.

[root@linuxstorages ~]# yum install nagios-plugins-all nrpe openssl

Configure nrpe configuration in remote host by adding Nagios server ipaddress.

 
[root@linuxstorages ~]# vi /etc/nagios/nrpe.cfg

[...]

## Line 81 - Add the Nagios server IP  and check_nrpe commands ##

allowed_hosts=127.0.0.1,192.168.1.54

##Line 210 ##

command[check_users]=/usr/lib64/nagios/plugins/check_users -w 5 -c 10

command[check_load]=/usr/lib64/nagios/plugins/check_load -w 15,10,5 -c 30,25,20

command[check_hda1]=/usr/lib64/nagios/plugins/check_disk -w 20% -c 10% -p /dev/hda1

command[check_zombie_procs]=/usr/lib64/nagios/plugins/check_procs -w 5 -c 10 -s Z

command[check_total_procs]=/usr/lib64/nagios/plugins/check_procs -w 150 -c 200

command[check_swap]=/usr/lib64/nagios/plugins/check_swap -w 20 -c 10

[...]

:wq (save)


Restart the nrpe service in remote host.

[root@linuxstorages ~]# service nrpe restart

[root@linuxstorages ~]# chkconfig nrpe on

Step 6 : Now switch back to Nagios server and edit below configuration file.


By default NRPE command wont be available in commands.cfg, to execute the in check_nrpe command in configuration file we need to add it in commands.cfg

[root@linuxstorages ~]# vi /etc/nagios/objects/commands.cfg

# add at the bottom

define command{

command_name   check_nrpe

command_line    $USER1$/check_nrpe -H $HOSTADDRESS$ -c $ARG1$

}

:wq (save)


Now Change configuration in nagios.cfg

    [root@linuxstorages ~]# vi /etc/nagios/nagios.cfg

    and uncomment the following lines.

    ## Line 52 - Uncomment ##

    cfg_dir=/etc/nagios/servers

    :wq (save)


Create a directory called “servers” under “/etc/nagios/”.

[root@linuxstorages ~]# mkdir –p /etc/nagios/servers

Now create a configuration files for remote host server's in /etc/nagios/servers path.

[root@linuxstorages ~]#cd /etc/nagios/servers

    [root@linuxstorages ~]#vi client-server-1.cfg

     Check nrpe configuration file in remote client machine so that we can use same command

     in this file too.

               define host {
          
            use                                 linux-server
          
            host_name                        client-server1
          
            alias                            client-server1
          
            address                         192.168.1.101
    
     max_check_attempts              5
    
     check_period                    24x7
    
     notification_interval           30
    
     notification_period             24x7
    
     }
    

        define service {

                use                                   generic-service

                host_name                        client-server1

                service_description              PING

                check_command               check_ping!100.0,20%!500.0,60%

                }

        define service {

                use                                   generic-service

                host_name                        client-server1

                service_description             SSH

                check_command               check_ssh

                notifications_enabled            0

                }

        define service {

                use                                  generic-service

                host_name                        client-server1

                service_description           CPU Load

                check_command              check_nrpe!check_load

                }

        define service {

                use                                  generic-service

                host_name                        client-server1

                service_description          Login Users

                check_command               check_nrpe!check_users

                }

        define service {

                use                                  generic-service

                host_name                      client-server1

                service_description          Disk Usage

                check_command              check_nrpe!check_hda1

                }

        define service {

                use                                  generic-service

                host_name                       client-server1

                service_description           Total Process

                check_command              check_nrpe!check_total_procs

                }

        define service {

                use                                  generic-service

                host_name                        client-server1

                service_description           Swap Usage

                check_command             check_nrpe!check_swap

                }


same configuration should to be done for all remote host client machines.

Restart the Nagios server, after all configuration's done in both client and server side.

[root@linuxstorages ~]#/etc/init.d/nagios restart

Running configuration check...done.
Stopping nagios: done.
Starting nagios: done.

Now access the Nagios Monitoring Tool in Web Interface by using Nagios admin link and make sure services for remote host.


Nagios Host View


Nagios Service View

Tuesday, August 19, 2014

Three Special Permission in Linux - SUID, SGID & Sticky Bit.

Three special permission in linux are SUID, SGID and Sticky Bit which is use to control the linux user in advance.


What is SUID?

The common explanation given for SUID is, it is an advance file permission SUID allows an user to execute a script as if the owner of the script is executing it.

Example for SUID

root@linuxstorages:~#ls -l /usr/bin/passwd
-rwsr-xr-x 1 root root 22984 Jan  2006 /usr/bin/passwd

SUID bit is set on an executable. It runs with the permission of its owner.

Command :

root@linuxstorages:~#chmod u+s  < file name >

                                  or

root@linuxstorages:~#chmod 4755  < file name >


What is SGID?

If the set gid bit on directory entry is set, file in that directory will have the group ownership as the directory, instead of than the group of the user that created the file.

Command :

root@linuxstorages:~#chmod g+s  < file name >

                                 or

root@linuxstorages:~#chmod 2755  <file name >


What is Sticky Bit?

Before set the sticky bit permission for folder, the irrespective of the users has rights to delete the folder. If the sticky bit permission set for the folder, respective of the user has rights to delete the folder.

Example for Sticky Bit

root@linuxstorages:~#ls -ld /tmp
drwxrwxrwt 32 root root 36864 Mar 27 12:38 /tmp

Command :

root@linuxstorages:~#chmod o+t  < Dir Name >

                                   or

root@linuxstorages:~#chmod 1777 < Dir Name >

Tuesday, August 12, 2014

File Permissions in Linux - Umask,Chmod,Chown.


File permissions

Linux uses the same permissions scheme as Unix. Each file and directory on your system is assigned access rights for the owner of the file, the members of a group of related users, and everybody else. Rights can be assigned to read a file, to write a file, and to execute a file.
Permissions on Unix systems are managed in three distinct scopes or classes. These scopes are known as user(U), group(G), and others(O).


Values for Read, Write and Execute.
Read        - 4
Write       - 2
Execute   - 1

  • The read permission grants the ability to read a file. When set for a directory, this permission grants the ability to read the names of files in the directory, but not to find out any further information about them such as contents, file type, size, ownership, permissions.
  • The write permission grants the ability to modify a file. When set for a directory, this permission grants the ability to modify entries in the directory. This includes creating files, deleting files, and renaming files.
  • The execute permission grants the ability to execute a file. This permission must be set for executable programs, including shell scripts, in order to allow the operating system to run them. When set for a directory, this permission grants the ability to access file contents and meta-information if its name is known, but not list files inside the directory, unless read is set also.
           
Symbolic Way
Numeric Way
Permission
User (U)
Group(G)
Others(O)
---                 ---                   ---
000
No Permission
--x                --x                  --x
111
Execute
-w-               -w-                 -w-
222
Write
-wx               -wx                -wx
333
Write & Execute
r--                 r--                   r--
444
Read
r-x                r-x                  r-x
555
Read & Execute
rw-               rw-                 rw-
666
Read & Write
rwx              rwx                rwx
777
Read & Write & Execute


To see the permission settings for a file, we can use the ls command as follows:

root@linuxstorages:~# ls A1.html
-rw-r--r--   1 root root  353 Aug 25 18:13 A1.html

Here file A1.html has the permission 644. Users have read & write, group and others have only read permission.

CHMOD 

Chmod command is used to set permission for the files and folders.

Eg: Numeric way of assigning permission to a file.

root@linuxstorages:~# chmod 640 ab.txt  

root@linuxstorages:~# chmod 666 ac.txt

root@linuxstorages:~# chmod 755 ad.txt

Eg: Symbolic way of assigning permission to a file.

root@linuxstorages:~#chmod  ugo+x  ab.txt

Adding execution permission to all user, group and others.

root@linuxstorages:~# chmod u=w,g=wx,o=x dd.txt

user – write, group – write and execute, others – execute.

root@linuxstorages:~# chmod u-wx,g-x,o-rw ac.txt

Removing write and execute from user, execute from group , read and write from others.

What is UMASK ?

The user file creation mode mask [umask] is used to determine the file permission for Normal and Root user.

Default value for Folder  777

Default value for File      666

For Root user Umask value is 022

Type
Permission
Umask
Subtract
Folder
Permission
Folder
777
022
777-022
755
rwxr-xr-x
File
666
022
666-022
644
rw-r--r--

For Normal user Umask value is 002

Type
Permission
Umask
Subtract
Folder
Permission
Folder
777
002
777-002
775
rwxrwxr-x
File
666
002
666-002
664
rw-rw-r--

To understand the value of default UMASK value for Root and Normal user.


root@linuxstorages:~# vi /etc/bashrc


CHOWN


Changing the user ownership of a file or a directory.

root@linuxstorages:~# chown <User Name> <File Name>

root@linuxstorages:~#chown storage sample.txt

-R option is used for recursive mainly for directories and have sub-directories.

root@linuxstorages:~#chown –R storages /home/backup

Permission will reflect to all it sub-directories in backup folder.


CHGRP

To change a group for a file or a folder.


root@linuxstorages:~# chgrp storages abc.txt

root@linuxstorages:~# chgrp storages /data

will change only to data folder.

root@linuxstorages:~#chgrp –R storages /data

will change all its sub directories in data folder.


© 2014 Linux Storages | Updated . All rights resevered. Designed by Templateism